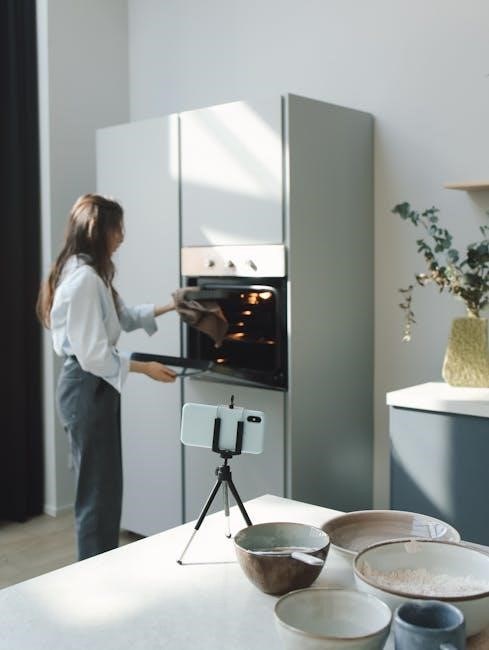
GE self-cleaning ovens offer a convenient and efficient way to maintain your appliance․ Using high heat or steam, they break down food residue into ash for easy cleaning․ This feature saves time and reduces the need for harsh chemicals, making it a popular choice for homeowners․ However, proper usage and maintenance are essential to ensure optimal performance and longevity․ This guide will walk you through everything you need to know about using and caring for your GE self-cleaning oven effectively․
Overview of Self-Cleaning Technology
GE self-cleaning ovens utilize advanced technology to simplify maintenance․ The high-heat self-cleaning function reaches temperatures up to 880°F, decomposing food residue into ash for easy removal․ This process eliminates the need for harsh chemicals, making cleaning more efficient․ Additionally, the steam clean feature provides a quicker option for lighter messes, combining heat and moisture to loosen spills․ These technologies work together to minimize manual effort while maintaining the oven’s performance and appearance, ensuring a hassle-free cleaning experience for homeowners․
Importance of Proper Maintenance
Proper maintenance is crucial for ensuring the longevity and efficiency of your GE self-cleaning oven․ Regular cleaning prevents food residue buildup, which can damage components over time; Avoiding extreme temperatures and using the self-clean feature wisely helps maintain the oven’s performance․ Additionally, routine checks on racks, seals, and sensors ensure safe operation․ Neglecting maintenance can lead to malfunctions and reduced lifespan․ By following recommended practices, you can keep your oven functioning optimally and avoid costly repairs, ensuring years of reliable service and hassle-free cooking experiences․
Key Features of GE Self-Cleaning Ovens
GE self-cleaning ovens feature high-temperature cleaning, steam clean options, and efficient cooling systems, ensuring thorough cleaning and maintaining optimal performance․
High-Temperature Self-Cleaning
GE self-cleaning ovens utilize high-temperature cleaning, reaching up to 880 degrees Fahrenheit, to decompose food residue into ash․ This intense heat breaks down tough spills and grime, simplifying cleanup․ The process is time-efficient and eliminates the need for harsh chemicals․ Ideal for deep cleaning, it ensures a thorough sanitization of the oven interior․ However, this feature is best used sparingly, as frequent high-heat cycles can impact oven components over time․ Proper ventilation is essential during this cycle to manage odors and fumes effectively․
Steam Clean Feature for Quick Cleaning
The Steam Clean feature on GE self-cleaning ovens provides a quick and gentle cleaning option for minor food spills․ By using steam, it loosens tough residue without extreme heat, making cleanup easier․ This feature is ideal for light maintenance and small messes, preserving the oven’s interior without damaging components․ Simply add water to the oven floor, select the Steam Clean option, and let the cycle run․ Afterward, wipe down the interior with a damp cloth for a sparkling finish․ This method is perfect for regular upkeep and prevents heavy grime buildup․
Efficient Cooling Systems
GE self-cleaning ovens are equipped with efficient cooling systems designed to manage high temperatures during and after the cleaning cycle․ These systems, often featuring fans or blowers, help dissipate heat and protect internal components from damage․ By circulating air, they ensure the oven cools down safely and quickly, even after reaching extreme temperatures․ This feature not only enhances safety but also prevents unnecessary wear and tear on the appliance, making it a reliable choice for long-term use․
Understanding the Self-Cleaning Cycle
The self-cleaning cycle uses high heat to decompose food residue into ash, simplifying cleanup․ The process is automated, ensuring efficient and thorough cleaning without manual effort․
How High Heat Decomposes Food Residue
GE self-cleaning ovens use high temperatures, reaching up to 880 degrees Fahrenheit, to decompose food residue․ This intense heat breaks down tough spills and grime into a fine ash․ The process is efficient, as the high heat ensures all food particles are converted into a manageable residue․ This method eliminates the need for harsh chemicals or scrubbing, making cleanup straightforward․ The oven locks during the cycle for safety, and proper ventilation is recommended to handle fumes․ Once complete, the ash can be easily wiped away, leaving the oven clean and ready for use․
Duration and Intensity Options
GE self-cleaning ovens offer adjustable duration and intensity options to suit different cleaning needs․ The self-clean cycle typically ranges from 2 to 4 hours, depending on the model and the level of soil inside the oven․ Users can select a shorter cycle for lighter messes or a longer, more intense cycle for heavy-duty cleaning․ The oven automatically adjusts the temperature and duration based on the selected intensity, ensuring optimal results․ This flexibility allows homeowners to customize the cleaning process while maintaining efficiency and safety․ Proper ventilation is recommended during longer cycles to manage fumes․
Automated Cool-Down Process
After the self-cleaning cycle completes, GE ovens automatically enter a cool-down phase․ This process can take 30 to 90 minutes, depending on the oven’s temperature․ Fans in some models help speed up cooling by circulating air․ The oven door remains locked during this time to ensure safety․ Once cooled sufficiently, the door unlocks, allowing you to wipe away ash residue․ This automated feature prevents overheating and ensures the oven returns to a safe temperature for the next use, making the process convenient and user-friendly․
Risks and Considerations
GE self-cleaning ovens pose risks like component damage and reduced lifespan due to high heat․ Proper precautions, like avoiding harsh chemicals and ensuring ventilation, are crucial for safe operation․
Potential Damage to Oven Components
The high temperatures during the self-cleaning cycle can potentially damage certain components of your GE oven․ This includes the heating elements, racks, and door seals, which may degrade over time due to extreme heat exposure․ Additionally, the intense heat can cause the oven’s interior surfaces to discolor or crack if not properly maintained․ It is crucial to follow the manufacturer’s guidelines to minimize wear and tear, ensuring your oven remains in optimal condition for years to come․ Regular inspections and timely replacements of worn parts are recommended to maintain efficiency and safety․
Impact on Oven Lifespan
The frequent use of the self-cleaning feature can potentially shorten the lifespan of your GE oven․ The extreme heat required for the self-cleaning cycle can cause internal components to degrade over time․ Modern ovens, in particular, may be more sensitive to such high temperatures, leading to premature wear and tear․ To maximize the longevity of your appliance, it is recommended to limit the use of the self-cleaning feature and opt for manual cleaning after each use․ This approach helps preserve the oven’s performance and extends its operational life․
Precautions for Safe Usage
When using the self-cleaning feature on your GE oven, it is essential to take safety precautions to avoid accidents and damage․ Always ensure proper ventilation to prevent the buildup of harmful fumes․ Never leave the oven unattended during the self-cleaning cycle, as the high temperatures can pose a fire hazard․ Keep children and pets away from the oven during and after cleaning, as the exterior and interior will be extremely hot․ Additionally, avoid using the self-cleaning feature if your oven has damaged or worn-out seals, as this can lead to inefficient performance and potential risks․ Follow all safety guidelines provided in the user manual to ensure safe and effective cleaning․
Preparing Your Oven for Self-Cleaning
Before starting the self-cleaning cycle, remove racks and accessories, wipe down large spills, and ensure proper ventilation․ This ensures a safe and effective cleaning process․
Removing Racks and Accessories
Before initiating the self-cleaning cycle, all racks and accessories must be removed from the oven․ This includes shiny racks, as they may be damaged by high temperatures․ Only enameled racks can remain inside during cleaning․ Remove any utensils, pans, or other items to ensure the oven is clear․ This step prevents potential damage to both the racks and the oven interior during the intense heat of the cleaning process․ Proper preparation ensures a smooth and effective self-cleaning cycle․
Wiping Down Large Spills
Before starting the self-cleaning cycle, wipe down large food spills in the oven cavity․ Use a damp cloth or paper towels to remove loose debris․ This step prevents food particles from melting and adhering further during high heat, which could damage the oven surfaces․ Avoid using abrasive cleaners or scourers, as they may scratch the interior․ Wiping down large spills ensures a more effective cleaning process and helps prevent unpleasant odors during the cycle․ This preparation is crucial for maintaining your oven’s condition and ensuring a safe, efficient self-cleaning experience․
Ensuring Proper Ventilation
Proper ventilation is crucial when using the self-cleaning feature on your GE oven․ Open windows and turn on exhaust fans to remove fumes and odors generated during the high-heat cycle․ This helps prevent the buildup of harmful gases in your kitchen․ Ensure your kitchen is well-ventilated to maintain a safe environment and reduce unpleasant smells․ Proper airflow also helps the oven cool down faster after the cycle, making the process safer and more efficient․ Always prioritize ventilation to protect your health and the longevity of your appliance․

Step-by-Step Guide to Starting the Cycle
- Locate the Self-Clean button on your GE oven’s control panel․
- Select the desired cleaning duration using the + or ⎯ buttons․
- Press the Start button to initiate the self-cleaning process․
Locating the Self-Clean Button
To begin the self-cleaning process, locate the Self-Clean button on your GE oven’s control panel․ This button is typically labeled as “Self-Clean” or represented by a specific icon․ On some models, it may be found alongside other cooking options․ Once you’ve identified the button, press it to activate the self-cleaning mode․ If you’re unsure about its location, refer to your oven’s user manual or look for a button with a cleaning or lock icon․ Ensure the oven is empty and all racks are removed before proceeding․
Setting the Cleaning Duration
After activating the Self-Clean mode, use the ‘+’ or ‘-‘ buttons on the control panel to set the desired cleaning duration․ The typical range is between 2 to 4 hours, depending on the level of soil inside the oven․ Select a shorter cycle for light cleaning or a longer one for heavy residue․ Once the duration is set, press the Start button to begin the cycle․ The oven door will automatically lock to ensure safety during the high-heat cleaning process․ Always refer to your model’s guidelines for specific time recommendations․
Initiating the Cleaning Process
Once the Self-Clean mode and duration are selected, press the Start button to initiate the cleaning cycle․ The oven door will lock automatically, and the unit will begin heating to a high temperature․ During this process, the oven reaches approximately 880 degrees Fahrenheit, decomposing food residue into ash․ Ensure the kitchen is well-ventilated to prevent fumes from accumulating․ The cycle runs for the set duration, after which the oven starts its cool-down phase․ Avoid interrupting the cycle until it completes and the door unlocks․
Monitoring the Cleaning Cycle
Monitor the cleaning cycle by ensuring the door remains locked, the oven reaches high heat, and it cools down properly․ Be aware of noise and odors, handle error codes like F2, and maintain good ventilation․ Avoid opening the door during the cycle․
Understanding Cycle Duration
The self-cleaning cycle on a GE oven typically lasts between 2 to 4 hours, depending on the model and selected intensity․ The oven heats to high temperatures, breaking down food residue into ash․ After the cycle, the oven requires 30 to 90 minutes to cool down before the door can be unlocked․ Ensure the door remains closed during this process to allow proper cooling and prevent damage․ Proper ventilation is crucial to manage odors and fumes generated during the cycle․
Handling Error Codes
GE self-cleaning ovens may display error codes like F2, indicating high oven temperature․ This often occurs during or after the cleaning cycle․ To resolve this, turn off the power at the circuit breaker for 5-10 minutes to reset the oven․ If the issue persists, ensure the oven has cooled down completely․ Other error codes may relate to sensor malfunctions or heating element issues․ Always refer to the user manual or manufacturer’s guidelines for specific code meanings and solutions․ If problems persist, contact a professional for assistance;
Managing Oven Noise and Odors
During the self-cleaning cycle, GE ovens may produce noise and strong odors due to high heat decomposing food residue․ These are normal, but you can minimize discomfort by ensuring proper ventilation․ Open windows or use fans to circulate air․ Avoid leaving the kitchen unattended to monitor the process․ For lighter cleaning needs, consider using the steam clean feature, which generates less odor and noise․ Always follow safety guidelines to manage these issues effectively during the cleaning cycle․
Post-Cleaning Procedures
After the self-cleaning cycle, allow the oven to cool completely before unlocking the door․ Once cooled, wipe down the interior with a damp cloth to remove ash residue․ Dispose of cleaning materials safely, such as used paper towels or gloves․ Check for any remaining residue and ensure all surfaces are clean․ Replace oven racks and accessories, ensuring they are clean and secure․ Properly ventilate your kitchen to eliminate any lingering odors․ Avoid using abrasive cleaners, as they can damage the oven’s finish․ Regular post-cleaning care helps maintain your GE oven’s performance and longevity․
Cooling Down and Unlocking the Door
The oven requires 30 to 90 minutes to cool after the self-cleaning cycle․ The door unlocks automatically once cooled․ Handle with care, as surfaces remain hot․
Wiping Away Ash Residue
After the self-cleaning cycle, allow the oven to cool completely․ Use a damp cloth to wipe away the ash residue gently․ Avoid using abrasive materials or harsh chemicals, as they may damage the oven’s finish․ For tougher spots, a soft sponge or paper towels can be used․ Ensure the cloth is not soaking wet to prevent water spots․ Dispose of the ash and cleaning materials safely․ This step ensures your oven is clean and ready for its next use, maintaining its performance and appearance․
Disposing of Cleaning Materials Safely
After wiping away ash residue, dispose of soiled materials responsibly․ Place ash and cleaning cloths in a sealed bag to prevent spreading dust․ Check local regulations for hazardous waste disposal, though ash from self-cleaning ovens is typically non-hazardous․ Avoid pouring ash or cleaning solutions down drains to prevent plumbing issues․ Wash reusable cloths or sponges thoroughly and let them air dry․ Proper disposal ensures safety and environmental responsibility, maintaining a clean and hygienic kitchen environment․
Troubleshooting Common Issues
Addressing error codes, resolving malfunctions, and identifying when professional help is needed ensures your GE oven operates smoothly․ Regular checks and proper usage prevent most issues․
Addressing F2 Error Codes
The F2 error code on your GE self-cleaning oven typically indicates an overheating issue․ This could be due to a faulty temperature sensor, a malfunctioning heating element, or improper door closure․ To resolve this, first, ensure the oven door is sealed properly and check the door seals for damage․ If the issue persists, reset the oven by turning it off and on again․ If the error continues, inspect the temperature sensor or heating element for damage․ In some cases, the cooling fan may not be functioning correctly, leading to overheating․ If you’re unable to resolve the issue, consider consulting a professional technician for assistance․ Regular maintenance and proper usage can help prevent such errors from occurring․
Resolving Oven Malfunctions
If your GE self-cleaning oven malfunctions, start by checking the power supply and ensuring the circuit breaker hasn’t tripped․ If the issue persists, inspect the temperature sensor or heating element for damage․ Clean or replace faulty components as needed․ For uneven heating, verify that the oven racks are properly positioned․ If the oven doesn’t turn on, ensure the door is closed securely and the child safety lock is disabled․ If problems remain unresolved, consult a professional technician to diagnose and repair complex issues․ Regular maintenance can help prevent malfunctions and ensure optimal performance․
When to Contact a Professional
If your GE self-cleaning oven displays error codes like F2 or fails to heat properly, it may indicate a serious issue requiring professional attention․ If the self-cleaning cycle causes damage or persistent malfunctions, such as faulty sensors or electrical problems, contact a certified technician․ Avoid DIY repairs that could void the warranty or cause further damage․ A professional can diagnose complex issues, replace faulty parts, and ensure your oven operates safely and efficiently․ Addressing these problems promptly prevents costly repairs and extends the oven’s lifespan․
Maintenance and Care Tips
Regularly wipe spills, use steam for light cleaning, and inspect parts․ Avoid abrasive cleaners and ensure proper ventilation for optimal performance and longevity․
Regular Manual Cleaning
Regular manual cleaning is essential to maintain your GE self-cleaning oven’s performance; After each use, wipe down the interior with a damp cloth to remove light spills and splatters․ For tougher stains, mix baking soda and water to create a paste, apply it, and let it sit overnight before scrubbing․ Avoid using abrasive cleaners or scourers, as they can damage the oven’s finish․ Clean racks by soaking them in soapy water or running them through the dishwasher․ Regular manual cleaning prevents heavy buildup and ensures the self-cleaning feature works effectively when needed․
Steam Cleaning for Light Maintenance
Steam cleaning is an excellent option for light maintenance of your GE self-cleaning oven․ This feature uses steam to loosen food residue, making it easier to wipe away without intense scrubbing․ Simply pour water into the oven’s steam cleaning tray, set the cycle, and let the steam work for 30 minutes to an hour․ This method is ideal for minor spills or splatters, as it gently cleans without extreme heat․ Regular steam cleaning helps maintain your oven’s interior and complements the high-temperature self-cleaning feature, ensuring your appliance stays in top condition․
Inspecting and Replacing Parts
Regularly inspecting your GE self-cleaning oven’s components is crucial for maintaining its performance․ Check racks, seals, and light bulbs for wear or damage․ If damaged, replace these parts to ensure proper function and safety․ Always turn off power and let the oven cool before handling any internal components․ Use genuine GE replacement parts to guarantee compatibility and longevity․ Addressing worn or faulty parts promptly prevents further damage and ensures your oven operates efficiently for years to come․
Frequently Asked Questions
Common queries include whether self-cleaning ovens can be left unattended, the recommended frequency of using the self-clean feature, and comparisons between self-cleaning and manual methods․
Can I Leave the Oven Unattended?
It is generally not recommended to leave a GE self-cleaning oven unattended during the cleaning cycle․ The high temperatures involved can produce strong odors and fumes, which may require monitoring․ Additionally, the oven door locks during the cycle for safety, and improper handling could lead to accidents․ While the process is automated, staying nearby to address any unexpected issues is advised․ Always follow the manufacturer’s guidelines for safe usage․
How Often Should I Use the Self-Clean Feature?
Using the self-clean feature on your GE oven should be limited to every 3 to 6 months, depending on usage․ Overusing it can reduce the oven’s lifespan by exposing components to extreme heat․ For lighter cleaning needs, consider the steam clean option․ Reserve the high-heat self-clean cycle for heavy residue buildup․ Always follow the manufacturer’s recommendations to maintain your oven’s performance and longevity․ Proper usage ensures effectiveness without compromising the appliance’s durability․
Is Self-Cleaning Better Than Manual Cleaning?
Self-cleaning ovens offer convenience and efficiency, especially for heavy-duty cleaning, as high heat decomposes food residue into ash․ However, manual cleaning is better for light messes and avoids the risks of extreme heat, which can damage components or reduce oven lifespan․ Manual cleaning also allows for immediate results without the long cycle time․ Ultimately, the choice depends on the severity of the mess and your preference for time-saving versus preservation of the oven’s condition․ Both methods have their benefits and drawbacks, so consider your needs when deciding which to use․